

Heraldic art is a secular art that has become more and more popular over time, so that nowadays it is commonplace to have family crest made to engrave it on a signet ring. Traditionally it was the men who adorned this jewel, in the little finger of their non dominant hand. Today however the finger in which its worn, differs across regions, depending on how bold these rings are preferred to be.
This type of approach is ideal to create a jewel of family value that will be passed on within the family over generations.
If you already know how to create your coat of arms, you certainly do not know what are the steps of the engraving of a coat of arms on the plateau of a ring.
And that's what we are going to discover here, the manufacturing of a ring with blazon using the most modern techniques of jewelry, with the help of specialist Nicolas Tranchant, who is founder of Vivalatina Jewelry from Mexico.
Vivalatina Jewelry specializes in the manufacturing of signet rings.
From drawing to computerized modeling
The project begins with the creation of a digital model of the ring with a coat of arms.
For that, the starting point is the design of the coats of arms. From the drawing, a file is created with the drawing of the coat of arms.

This example of a coat of arms will be engraved in a silver signet ring.
Using computer software, a reproduction of the coat of arms on a signet ring design is made so that it reaches the customer's needs.

Thanks to the computer tool, a photo of the blazon has been turned in a computer file containing all the details of the digital model of the project with blazon.
From a virtual file to a real metal ring
Once the design of the signet ring is validated, the digital file of the model of the ring is used to share it with a 3D printer, allowing to create a physical model from the virtual model.
Here is the result after 3D printing the 3D file:

3D wax model obtained from the 3D files with the help of 3D printing process
You can recognize of course on the wax model all the details of the coat of arms, namely the cross, the two wheels, and the two horses.
Follow then the manufacturing stage of the silver ring (or gold, as needed) by the lost wax casting method.
The wax model is therefore used to make a refractory plaster mold, that once solidified, is heated to remove the wax from the mold.
The liquid molten silver is then poured into the mold, allowing to get our final piece, foundry gross, visible below.

Check here the casting shaft containing the ring just out of the melting stage.
While the following photo shows the detail of the engraving of the blazon, still raw foundry.

It remains to finalize the ring deburring it and detailing the finer details.

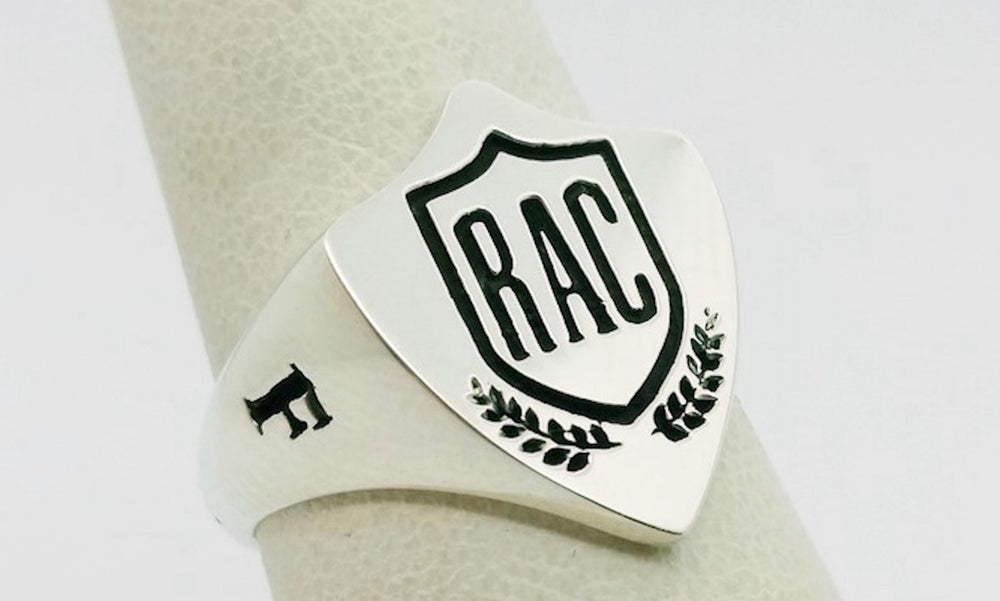
The background of the engraving is then oxidized to blacken and make more visible the details of the coat of arms by the contrast created between the black background and silver polished relief.

View of the signet ring worn on the finger

This example shows the steps of creating such a ring, knowing that all designs are possible in terms of ring design and blazon design.
Here's a quick look at other designs of silver or gold emblazoned rings, created by him.

Leave a comment
Also in Blog Posts
Anniversary Gemstones : A Complete Guide
By Nirwaana Admin February 27, 2021
We all have known about birthstones. But did you know there are specific gemstones to mark celebration of each anniversary milestone? Well yes, wedding anniversaries too have gemstones associated. Here we’ve compiled a list of ‘anniversary gemstones’ for each year. Next time you want to pick a gift for the wedding anniversary, make it super special! There is nothing is better than a gemstone jewelry, devoted to a particular anniversary.
Continue reading
Choose The Jewelry That Suits You Most
By Nirwaana Team 1 January 21, 2021
Continue reading
What Metal & Gemstone Colours Look The Best On You
By Nirwaana Admin June 15, 2020
Here are simple guidelines to select jewelry that suits your skin undertone, which will make your next online jewelry purchase easy & convenient.
Continue reading